-->

Monday, September 7, 2015

Plenty of Purple

Have I ever mentioned how much I am drawn to purple?  I simply love the versatility of it.  My nail polish collection is drowning in pink and purple!  How is it that there are so many different shades?  I have combined a bunch of purples for this mani!


I'm not even sure why I turned to purple for this look.  I guess I just wanted to show it some love.  You know I love a gradient look too!  Had I not been circling the nail art forums so many years ago, I wouldn't have known the beauty.  I love this community so much and everything it teaches me.  :)


I started with my usual base coat to protect my nails and then started with 2 coats of In A Lily Bit.  Once that was completely dry, I started the gradient.  I use a make-up sponge for my technique.  I put a stripe of each color on the sponge and lightly add it to each nail.  Once each layer is dry, I go back over it until I am happy with the color.


I can't even begin to express how much I love Winterberry!  It has the deepest color with such a hint of shimmer.  A lot of people like to do gradients with only 2 colors, which are absolutely stunning.  I, somehow, typically gravitate towards three colors.  For my accent nail, I applied 2 coats of Stevie to my ring finger.  In my opinion, Zoya makes the best textured polishes.  They can be worn with a top coat (which is my preference).


Once the polish is dry, I put a layer of Seche Vite on to even out the color and to prepare for stamping.  I used BM-711 for this image.  I love the fine lines and MDU Copper was a perfect accent.  Another layer of Seche Vite finished this pretty manicure off.


I also, for the first time ever, stamped my big toe while I did a matching pedicure.  It is the first time I have been able to bend that far over since having 2 major back surgeries two years ago.  That was fun!  Not to fret, I won't ever post a picture of my feet on here.  Thanks for stopping by!

post signature

Saturday, August 22, 2015

Summer Fresh

Hello Friends!

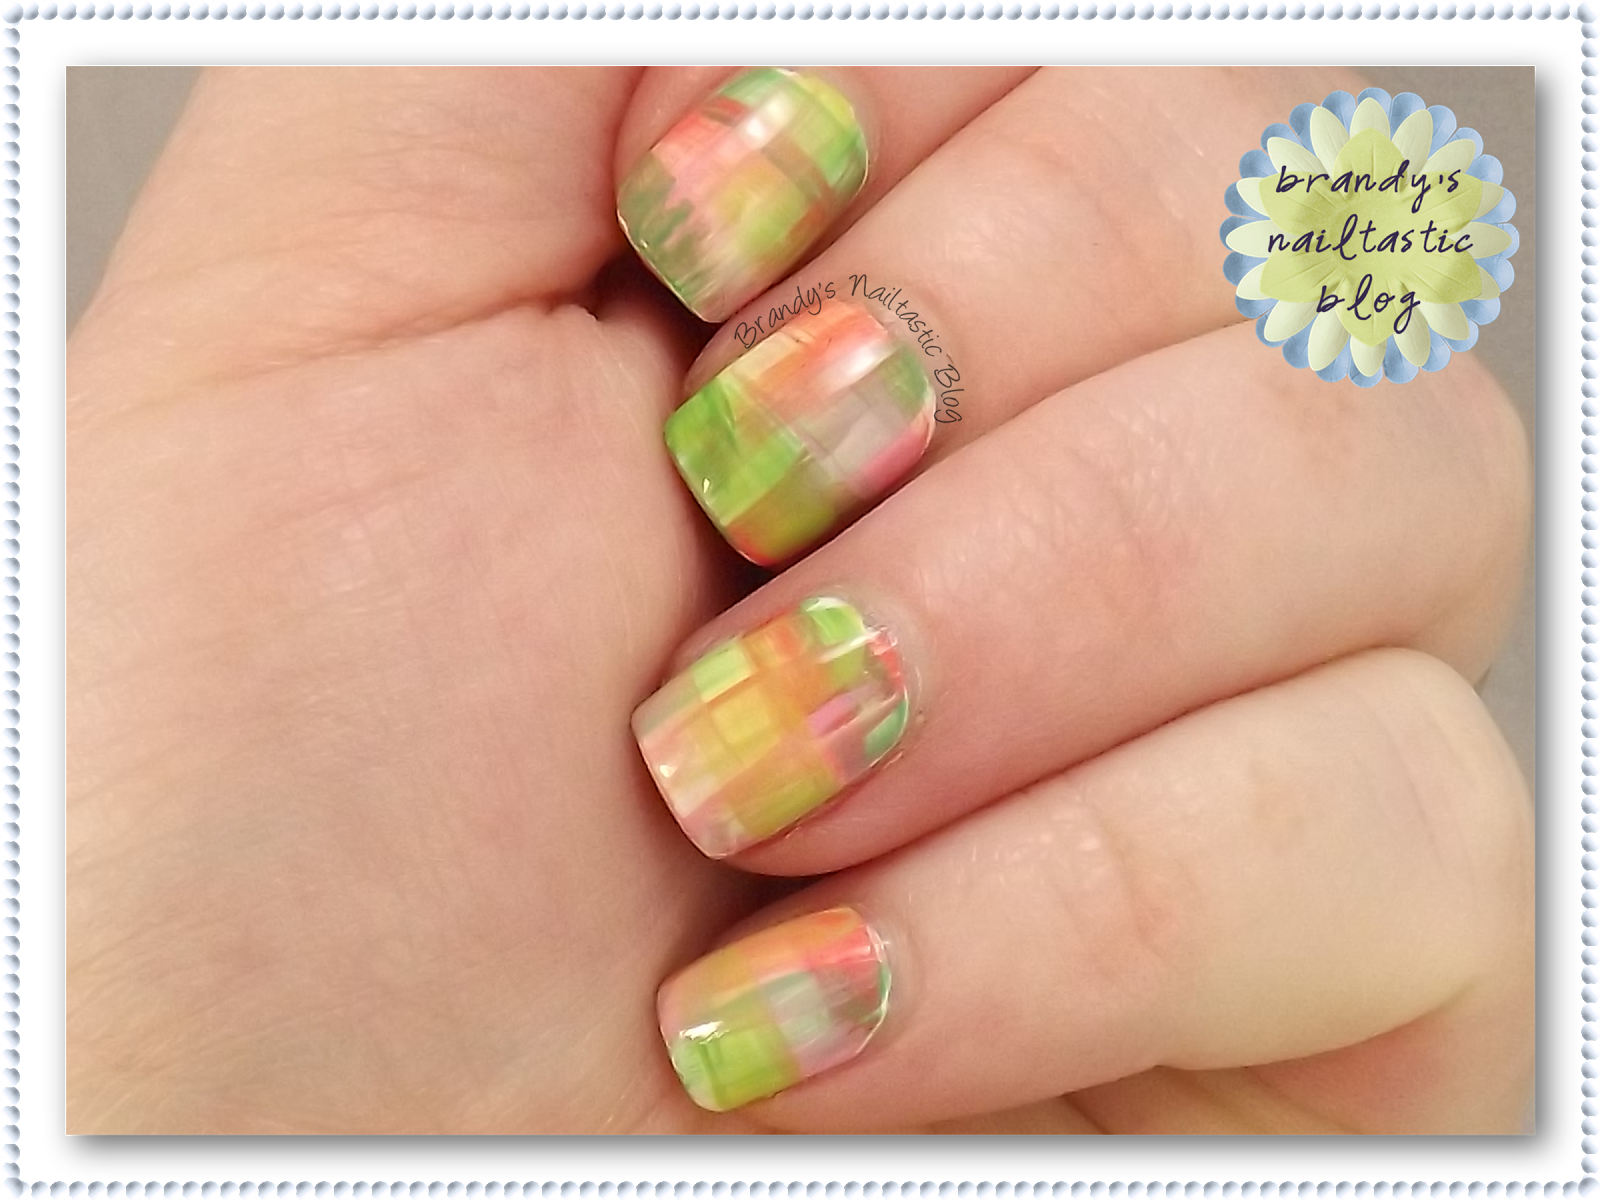
It's been a long while since I last posted but today I have a summer ready manicure that was super easy and really adorable!


I started with a white base coat and then added the colors below in one-stroke fashion to my desired color density.


I was very inspired by The Nailasaurus for this look.  You can see her original post here.  To do this look, all you need is a few colors that you want to blend together.  I dropped a few drops of color on a piece of tin foil and then used a spare brush to mix some acetone into the drops of color.  Once it was thinned out a bit (watery), I did only one stroke across the nail in the horizontal direction then a vertical one.


I tried to do each nail a bit different so the strokes wouldn't be the same.  This was really fun to do and super quick!  Once the colors looked good to me, I ended with a layer of Seche Vite for a super shine.


Thanks for stopping by!

post signature

Wednesday, May 27, 2015

Purple Pleasure

The hubby was in charge of color this week.  He wanted purple (over my pink choice) and I had already committed to trying a radial gradient.  Here is what we ended up with.


This was really fun to work on and I love how it came out (for a first go at the radial gradient technique)!  I know there is room for improvement on my placement and probably color variation.  I used quite a few polishes for this one:


I am in love with using latex on my fingers to help with clean up these days, so once I put down my usual base coat, I slathered on some liquid latex (in my fancy neon blue color) on all of my fingers.  The tricky part is not letting your fingers touch because the latex likes to stick to itself!  So, once that was on and dry, I added a layer of a white base coat to help get the color to pop.


I used a make-up sponge and put the polishes in a bullseye pattern with lightest in the middle and just tried to center it on the nail.  After about 3 or 4 passes, I was pretty happy with it.  There was a lot of indecision on a stamping color this time too but I love what I picked.


I used an image from Pueen 47.  Surprisingly, the MDU Violet was kind of runny and was hard to get a clear image from but you can barely tell!  Thank goodness.  LOL!  the MDU Purple is a perfect accent nail!  Hubby was really skeptical, but once I had my nails all cleaned up, he was on board!


post signature

Monday, May 25, 2015

Cranberries In The Sand

I wanted to do something with a neutral color and red.  That is all I had to work with for this design.


I ended up with cranberries lounging on the beach.  LOL  That is all I can think of when looking at this.


Wocka Wocka! is just divine!  The color is irresistible and it paired wonderfully with On Taupe of the World.  I used a make-up sponge to apply these two colors over a base of the ULTA nude.  I did this on ALL of my nails then added the glitter only on the accent nail - with a make-up sponge to get the glitter spread out without the weight of the clear base.

2
One thing I learned on this manicure is that Seche Vite will spread the red color!  I lost a couple of fingers on my non-swatching hand learning how to really "float" the top coat on.  Once I had that down, it was much better!


post signature

Blue Hibiscus

This has been one of my favorites so far this spring!  I chose a Blue-Teal gradient with stamping for a Spring pick-me-up mani.


I started with a white base over my typical base coat.  Then, using a make-up sponge, I added several layers of the colors below to get the desired look.


I used the China Glaze at the very end to get a little bit of shimmer over the Color Club to be on the same level as the Sinful Shine.  Once the color saturation was where I wanted it, I used Pueen 72 and my wonderful MDU stamping polish to add some hibiscus images.  I wanted to vary it up so I added them in all different locations on my nails.


I loved this so much that I wore the heck out of it!


Happy Spring!!


post signature

Tuesday, April 28, 2015

Cotton Candy

Have you ever seen those bags of cotton candy where, when you open it, there are several colors all smooshed together?  That is what this looks like to me.


I wanted to brave the watermarble technique again but this time I wanted to try something different.  I had seen a tutorial where you can pull the design off of the water and use it like a decal rather than dipping your fingers in the water.  Well, that was a total and complete failure.  I want to chalk it up to the polishes I used rather than my own issues...  I couldn't give up after the hours of trying to make this work so I did it the traditional way.


I used the white as a base layer of polish, then applied liquid latex around my nails and on my fingers to make the process less awful.  LOL!  Well, there is one thing I learned about the latex: don't let your fingers stick together!  It was really comical to see me trying to pull my fingers apart with bright blue webbing from the latex.


There were other disasters during this process as well.  There was a clump of latex that somehow got caught in the Seche Vite on my pinkie nail so that is why there is a divot.  I also found some fuzzy something or other while putting top coat on the other hand and when I pulled it out, it smeared everything.  It can't be great every time and it was a funny story to tell my friends.  I mean 5 hours of a manicure should have something awesome come out of it!


All in all, I like it.  I hope you do too.


post signature

Monday, April 20, 2015

Orange Dream

It's Spring and time for brighter colors to shake off the winter drab.  As I write this post, it is storming outside - you know the really great kind of rain storm that puts you at ease.  This is the sound people like to sleep to and I love it!  OK, on to the nail stuff...


The more I stamp, the more I love it!  Here is what I used:


I used a white under polish, then 2 coats Charismatic.  Once this was semi-dry, I added a layer of Seche Vite to harden it for stamping.  I used some liquid latex around my nails to help with clean up as well.  Tangent: I am not sure how I feel about it.  It DOES help with cleanup but I can't seem to always get it all off my nails.  Mixed feelings so far, but I will keep trying it out.


I used one of the images from Pueen 55.  It is really hard to tell, but I used Peach to stamp all of my nails except my ring finger where I used Cream.  It is very subtle, but you can see more of the difference in person.  Gotta love cameras.  :)  It's a fun manicure though an perfect to get my mindset right for Spring.


post signature

Sunday, March 29, 2015

Spring Is In The Air (barely)

Just a quick blurb today.  I have been absent because of a lack of motivation.  Work is draining the life out of me.  Hopefully, with the turn in weather, I will have more energy to keep up with this hobby.  I do love it and the irony is that I feel like it relieves stress for me.  Baby steps...


It has been so long since I have done this, that I completely forgot to put down a base coat!  I love the Tulip Season color!  It goes on rather streaky and took 3 coats but the end is wonderful!  I used MDU Fiji and Black to stamp from Pueen 71.


I hope to be back sooner rather than later!  Thanks for stopping by.  :)


post signature

Sunday, January 18, 2015

Marsala Wallpaper

You know me!  I like to do combo mani's and this time I did a wallpaper design (more like a border) along with a Marsala-like color combo.  I have to say, I wasn't impressed with the 2015 Pantone selection until I saw KB Shimmer's take on it with Men Are From Mars-ala.  That color is amazing!  I used it as inspiration for this:


As my collection grows, I feel more and more guilt so I went to my stash to find something I hadn't used yet.  Here is what I used for this mani - I kept it very simple!


For once, I didn't use a white polish as an undie for this manicure.  I used my usual base coat and followed it up with 2 coats of Tan Lines and 3 coats of Quit Meatal-ing as my base polishes.  After that was mostly dry, I added a coat of Seche Vite to harded the layers and prepare for the taping process.


I worked on each nail individually to get crisp lines when the tape was removed.  Once the tape was down on the nail, I did 2 coats of the reverse polish and then quickly removed the tape strips.  This is my first "wallpaper" look this month.  I think it looks more like a border pattern.  Once the polish was dry, I finished it off with a final layer of Seche Vite.  This one was pretty rugged...I wore it for over 2 weeks!


post signature

Thursday, January 1, 2015

2014 Holiday Nails

Time to wrap up 2014 with my holiday nails.  I just wanted something simple but it didn't end up that way.


It was a great Christmas this year.  Mostly because I was actually in the spirit of it.  I haven't really participated in the festivities for several years but this year I wanted to.  I just wanted to be charitable to others.  I even adopted some seniors from a tree at work.


I used a white undie to get the colors brighter.  Saucy went on like a dream.  It has to be one of my most favorite reds in my collection!  I only shop vintage was tougher.  It was hard to get good coverage and I managed to get it in 3 thick coats.  But the color!  It just makes up for it in the end.  Once my colors were done, I added a layer of Seche Vite in preparation for stamping.


All of these images are from plate BM-H03.  My MDU's stamped really well but, man, that wreath was a challenge!  It's one image and you have to be careful with the MDU's as they will muddy up really easily when using more than one color on the stamp.  That took some practice, but I got it.  The red on the gold color is DIVINE!!!


Happy Holidays and welcome 2015!

post signature