-->
Showing posts with label Jewels. Show all posts

Sunday, November 6, 2016

26 Great Nail Art Ideas - Halloween in the Wrong Colors

Ok, I am so late with this that I'm not even going to bother with any kind of intro...


For this look I dabbed all kinds of colors (listed below) onto a makeup sponge and applied to my nails.

What I Used:
* Sephora by OPI - Seeing Pink Elephants
* China Glaze - Friends Forever, Right?
* China Glaze - New Birth
* China Glaze - Spring In My Step
* Bonita - some purple color that has no name on the bottle
* Sephora by OPI - Natural Environ-mint
*Stamping polishes - MDU - Tutti, Neon Blue, Neon Green
*Stamps: BM-S205, Mash-38


I also added a few little pearls to each spider's back on the accent nail.  Not that it is obvious, but the pearls are the color of the opposite spider.  It was a super cute mani for Halloween.  


Thanks for stopping by - even if we are well into November now.  

post signature

Tuesday, October 28, 2014

Halloween 2014

For my Halloween mani this year, I went with spiders.  I actually have a bit of a phobia of spiders, but I had seen a lot of really cute designs on Pinterest which inspired me.


I want to start off with just how excited I am that my spider web stamp worked...I've had it for 2 years and this is the first time I have been able to get it to stamp!  Thanks to my Mundo de Unas stamping polish!


I applied my typical base coat followed by 2 coats of Ulta Devious.  I then sponge applied the Orly Intergalactic Space which provided great glitter coverage without adding too much of the black jelly base it is suspended in.  I also sponge applied a small amount of the Barielle Purple Hearts.  This was a great partner to the Orly glitter!


After a LOT of practice and cleaning off my BM13 spiderweb image, it finally stamped perfectly!  I used the MDU Silver for the webs and spider. I sponged a little bit more Purple Hearts on top of the webs for a little more dimension.


I added some gems on top of each nail as well.  I had to have red for the spider!  The webs all have a purple stone in the center.


Once the gems were firmly affixed, I topped everything off with a thick coat of Seche Vite.  I am super pleased with how these turned out!  I think they are a "cute" spooky look.  :)


I'm submitting this in to Crumpet's Nail Tarts 52 week pick-n-mix challenge as there are 3 dark polishes in this.  Take a look at the other lovely works below!

post signature

Tuesday, December 17, 2013

Gift Wrapped Nails

I love pretty packages!  I am not a very good wrapper though.  I actually suck at it.  LOL!  I am very well known for gift bags.  Anyway, I saw a photo on Pinterest that really struck my fancy.  Take a look!  I also took inspiration from a photo on Facebook from another nail art enthusiast (Andrea aka Plasmaspeedo) that showed her Christmas tree with lovely, color coordinated packages underneath (here).  With all of that inspiration check out what I came up with...
Starting with the polish choices:
  • Ulta Snow White
  • Ulta Pinata-Yada-Yada
  • Sinful Colors Tokyo Pearl
I started with 2 coats of the Ulta Snow White.  This was my first time using this polish (in case you didn't already know, I am trying to show all of my polishes some love and affection and use them all in some nail art) and I have to say that I wasn't overly impressed with the coverage.  Even after 2 coats, it wasn't level coverage enough to wear by itself.  Fortunately, I was doing more so I left it as is.  I then added 2 coats of the glitter polish Pinata-Yada-Yada.  This went on much better!  The glitter spread easily and I didn't need to worry too much about coverage as I wanted it to be fairly sparse.  Once that was dry, I added one very thin coat of the Sinful Colors Tokyo Pearl to mattify the glitter a bit, but keep the white look.
I topped all of that off with my trusty Seche Vite and let it thoroughly dry.  Once dry, I began adding the striping tape.  I used a gold color as I just wanted it pretty and not overly Christmas-y.  Once the tape was all in place, I added one little gem to each nail.  I use a cheap clear polish to do this because I go over everything with Seche Vite again - and again.
I just love this!  I have done the majority of my Christmas shopping already, thankfully.  I did pretty much everything online this year.  We don't have a tree up but there is more than enough snow on the ground to make it feel like Christmas.  Oh, and by the way, I had everything gift wrapped from the merchant.  LOL!

post signature

Tuesday, December 10, 2013

December Holiday Party Look

Today, we had our annual holiday gathering at work.  It is only the 10th and we are forcing ourselves into the Christmas spirit.  We had a little lunch and the fun secret Santa gift exchange.  Can you guess what I got?  Yep!  Polish!!!

For my nail look, I sported some green and red!

  • Neutral: Sinful Colors Social Ladder
  • Green: Ulta Envy
  • Red: China Glaze Just Be-Claws
I wanted a half-moon look but needed to leave room for my gem.  I started with 2 coats of Social Ladder.  Using reinforcements, I taped off my half-moon region and alternated the red and green on all of my nails (2 coats each).  


I used the opposite colored gem on each nail and adhered it with a little clear polish.  I topped everything off with a coat of Seche Vite.


This look actually reminds me a little of some gross fruit cake with green and red maraschino cherries.  But, Envy and Just Be-Claws are perfect Christmas colors!

Happy Holidays!!

post signature

Sunday, May 5, 2013

NOTD: Revlon's Iced Mauve

I decided to follow in ChaChaCakes footsteps and do a "Lucky Lacquer Lottery" today.  I have so many untried pinks that I went to that pile of nail sticks.  I pulled Revlon Iced Mauve to use.  I am loving these Revlon's lately.  I got them on clearance for 75% off a long time ago and haven't really used them much.
I wanted to keep it simple today so all of the nails are 2 coats of the Revlon Iced Mauve.  This polish is pretty opaque with only one coat but for a smooth finish, I went with 2 thin coats.  My ring finger is a shooting star theme with a star and some similarly colored glequins from BPS.
I put one coat of Seche Vite on top of everything for a nice glossy finish.  If you have this polish, dig it out - it is really pretty with the slightest shimmer in it.


post signature

Saturday, February 23, 2013

Classic French

It has been so long since I have done a french manicure!  I just felt like something simple.  So, I decided to do an old fashioned french. 


I will tell you what I used for this look.  As I have mentioned before, I get annoyed with Color Club because they don't label the bottom of their bottles all of the time!  So, I got these in a bundle pack and will tell you what I think their names are.

I used 2 coats of Oh Naturale and one coat of Pardon my French for the tips.  I cheat when it comes to doing my tips because my freehand is not so good.  After I put a layer of Seche Vite over the pink color, I did the tips.  I added a coat of Wet 'n Wild Hallucinate for the glitter effect.  I used some sequins to accent a couple of the nails.  I was mostly playing around with them to see what I could produce.  It's not to shabby.  I really like my flower.  LOL.  I then topped everything off with another layer of Seche Vite.


Thanks for visiting!
Brandy

Tuesday, January 1, 2013

New Year's Eve Nail Mail

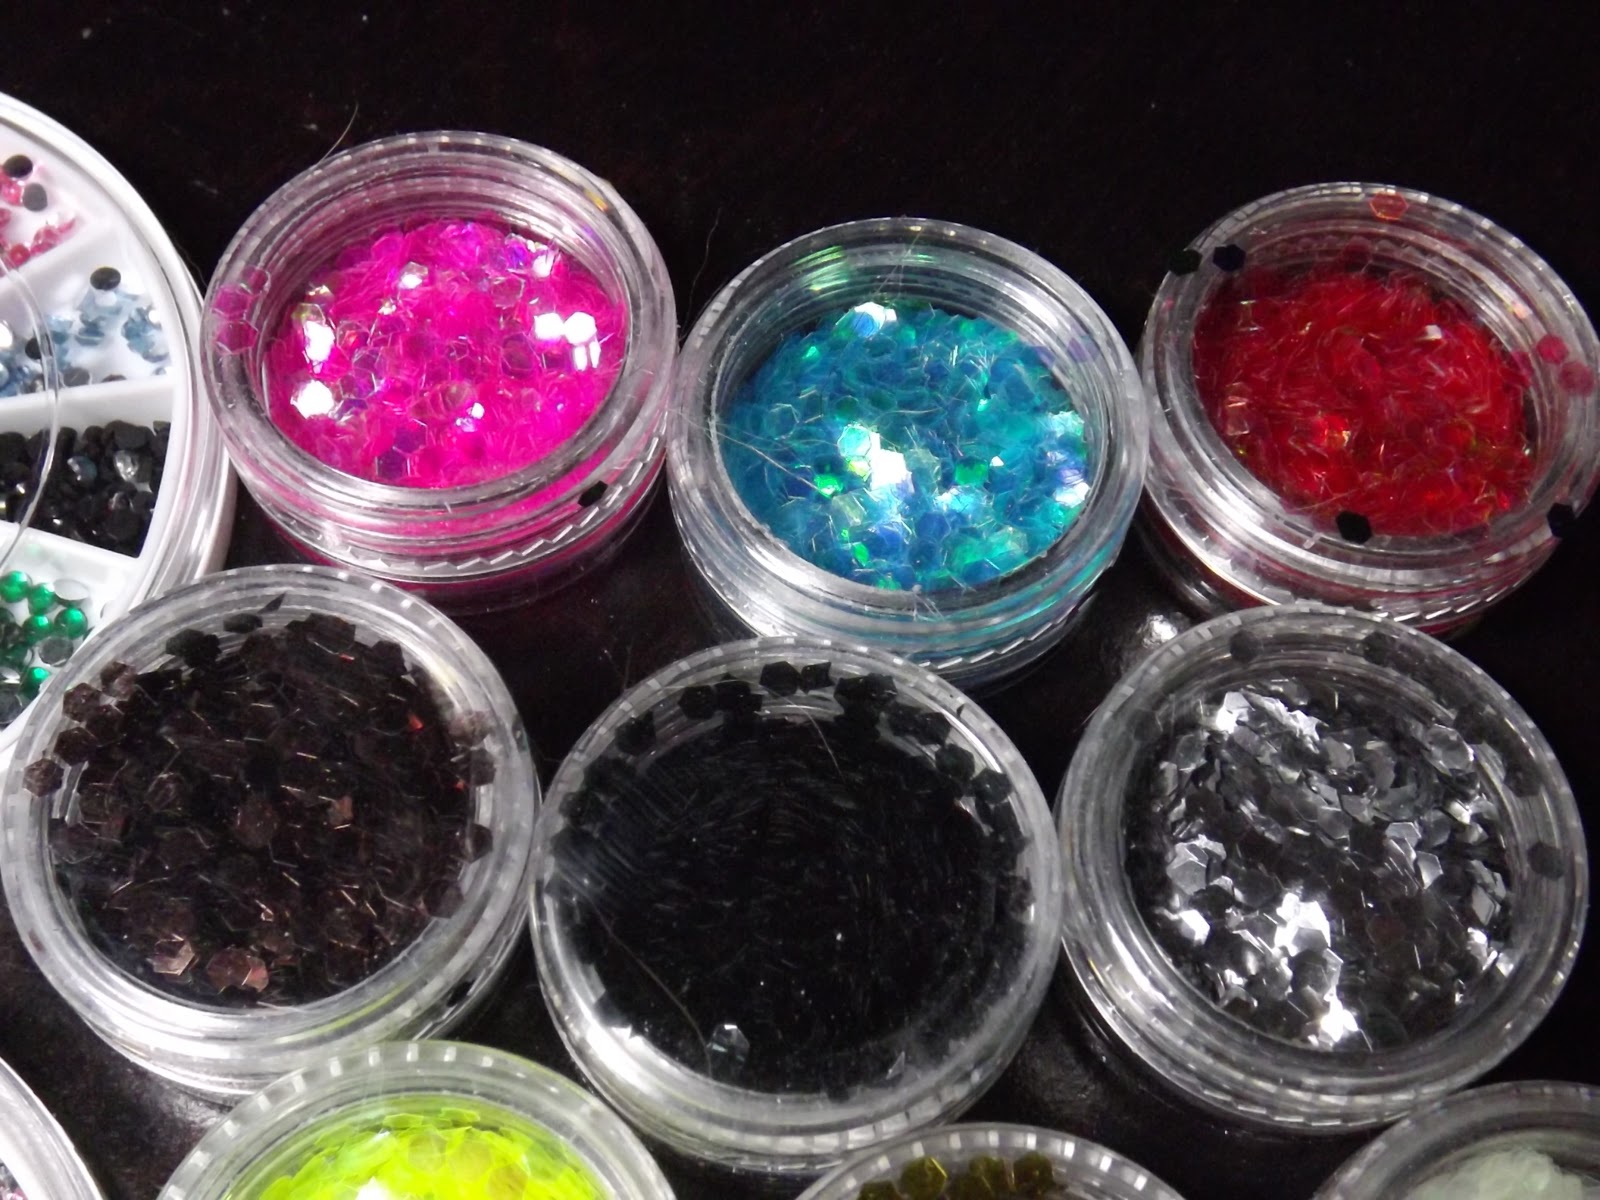
I love getting mail!  I love getting nail mail even more!  I have a lot of orders out there right now because my financial diet is going to be a year long trial.  This is going to be hard.  So, I had to prepare myself for this endeavor by buying all that I knew I needed (wanted) within reason in December.  I found these little beauties on nomorerack.com.  I have had some not-so-good experiences with this website, but my sister buys tons from there so I decided to try it again.  I was surprised to get these in the mail when I did since my account profile says that it is still "processing".  Anyway, you can see what I got in the pics below (very pic heavy).  I got 6 nail art decal wheels and 18 pots of hex glitter!  Oh. My. Gosh.  I love the glitter, but I was disappointed in the size of the pots.


The glitter is simply AMAZING!  I can't wait to attempt this new feat!  I haven't ever worked with it but I have seen some great tutorials on how to do it.  This should be enough to get me started...LOL.

Thanks for visiting!
Brandy